
The interface
Wire it, program it, take it to sea.
One task on screen at a time, every setting right where the part is, and screens big enough to read. From the main menu to the open sea, this is how you build, wire and sail in Sea Wake.
01
The main menu
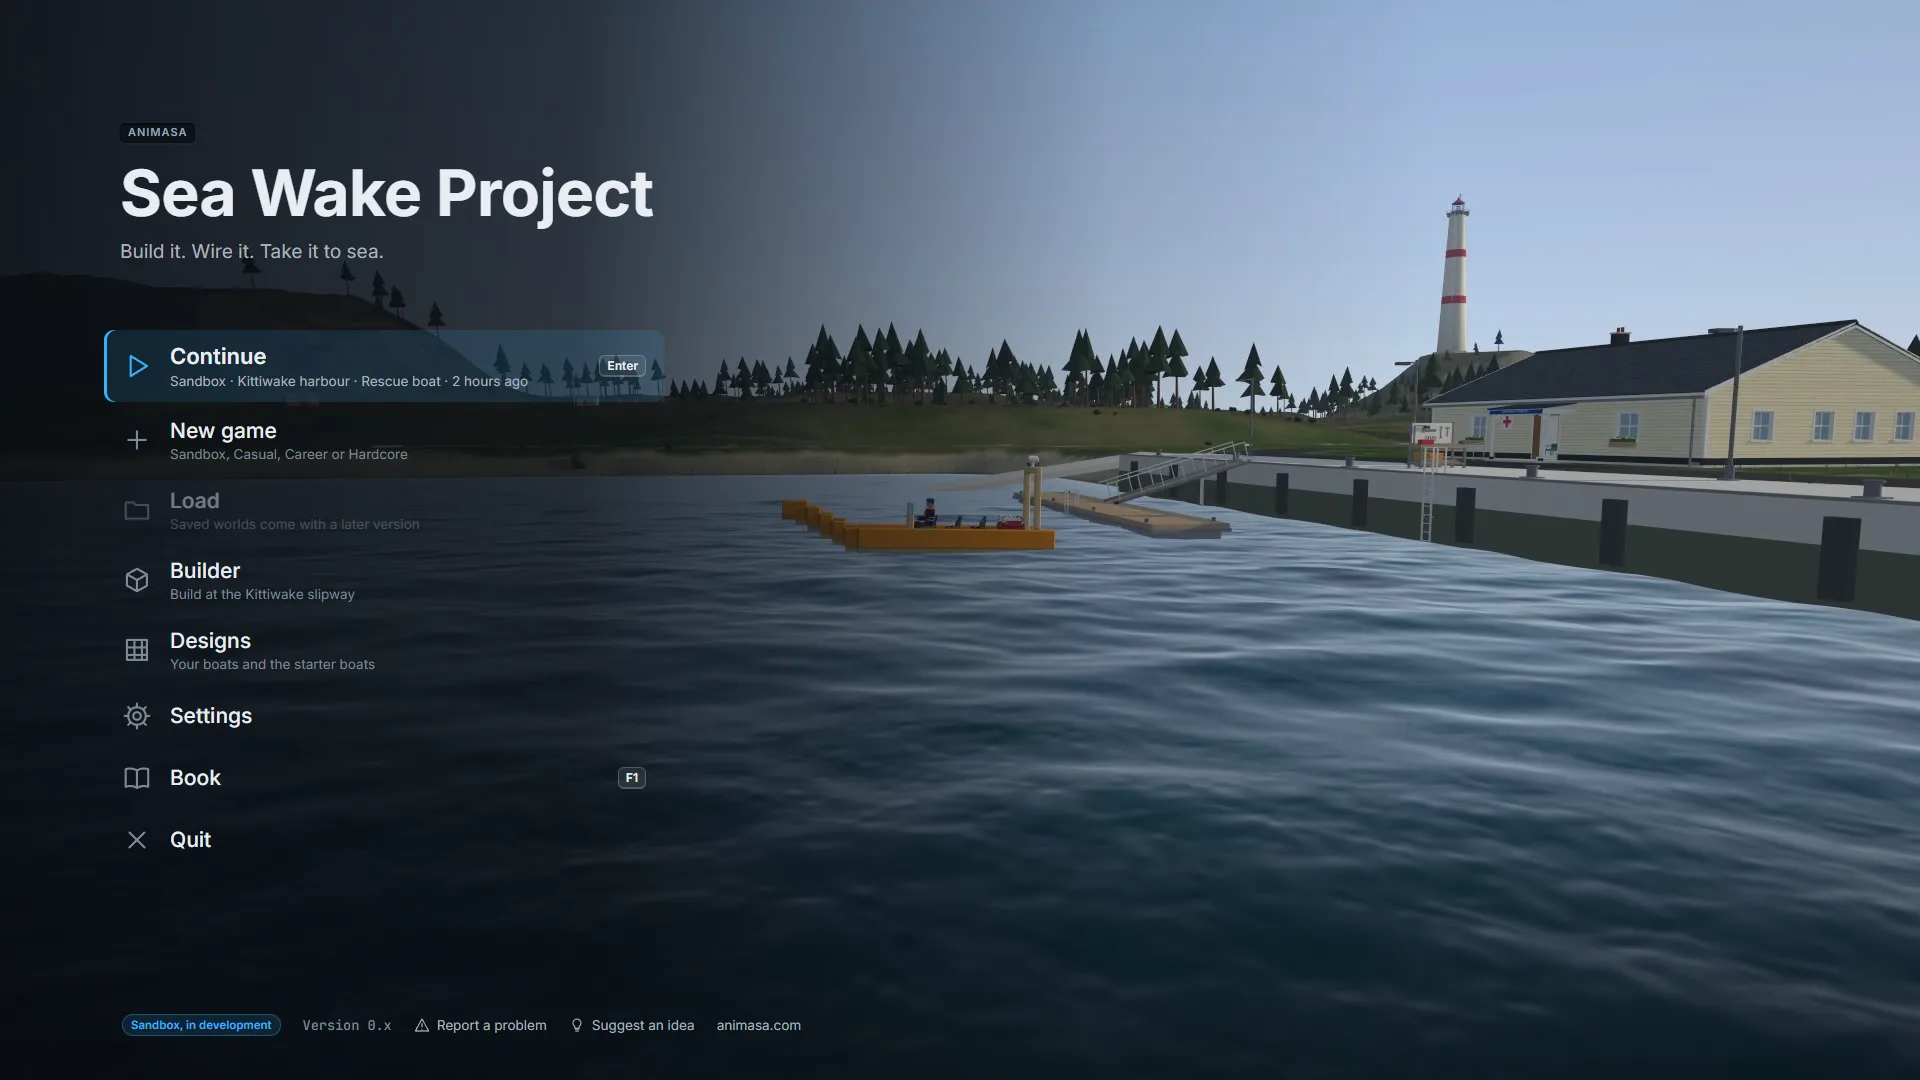
The game opens on the home harbour at golden hour, live behind the menu. Continue where you left off, start a new game, or go straight to the builder or your saved designs.
02
The builder
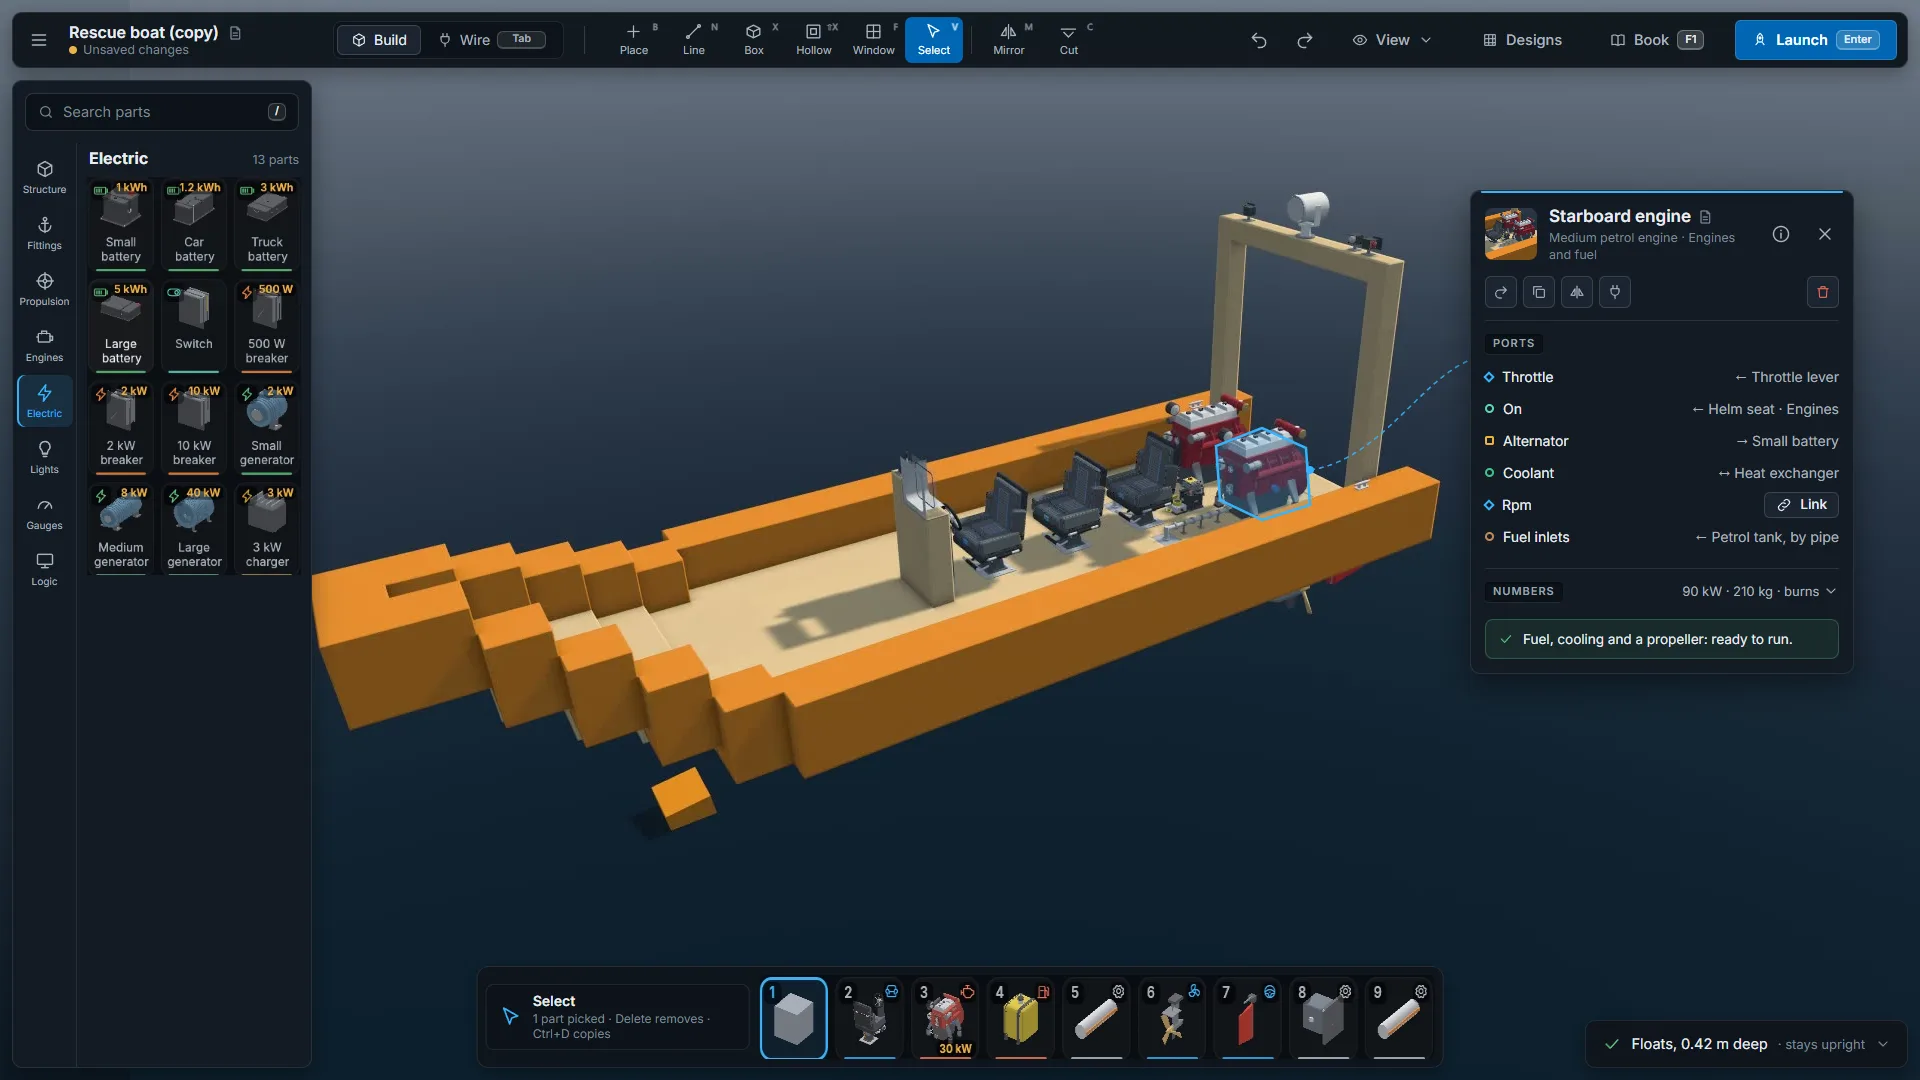
Pick a part and its card opens right beside it: turn it, copy it, see every port and what it links to, and a plain line on whether it can work. The middle of the screen stays your boat.
03
Your designs
Every boat you saved and every starter boat, as big pictures. Search by name, note, tag or the parts a design uses, sort them into folders, and see a design's numbers before you open it.

04
Wiring, right over the boat
Switch to Wire and every part with ports shows a card hanging above it in 3D, where it stays until you move it. Drag from one port to another to link them; let go on empty space and a search lists only the ports that fit.

05
Logic, on its own bench
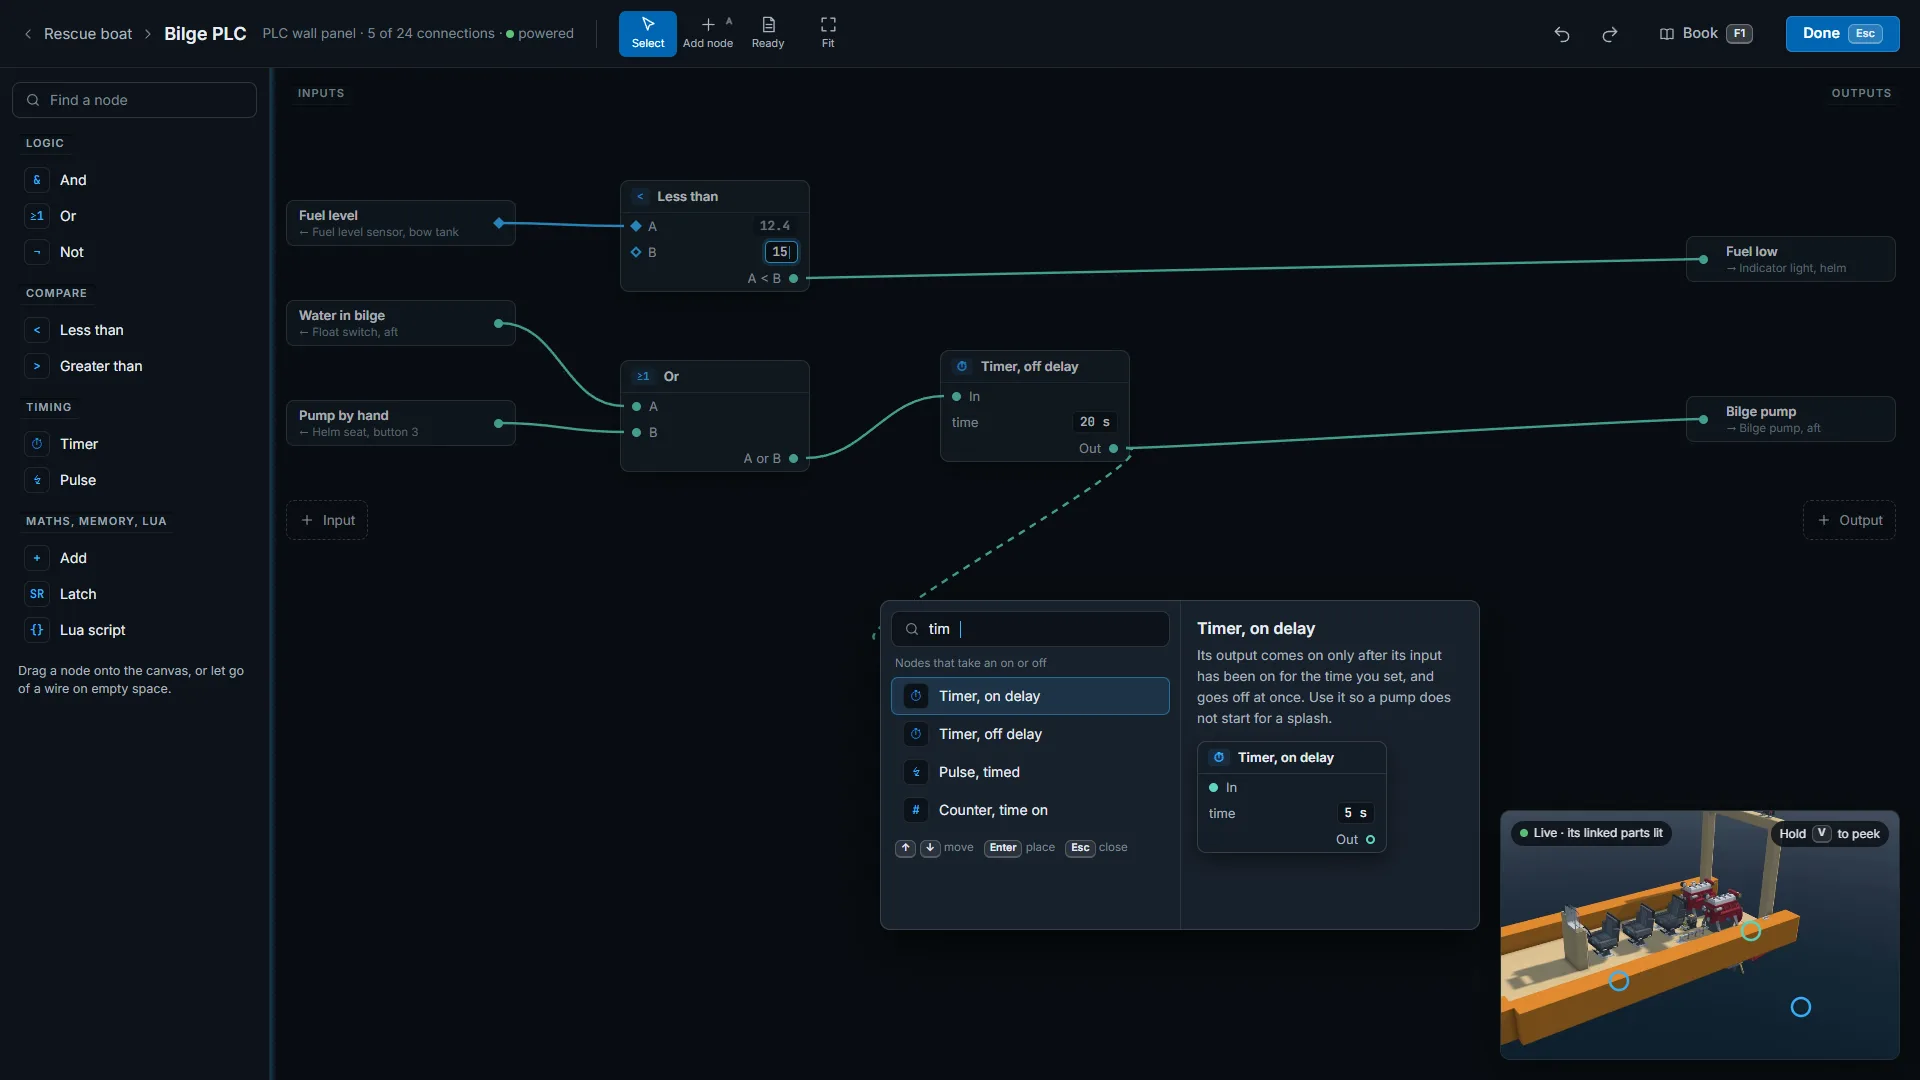
Open a PLC and its program takes the whole screen: inputs on the left, outputs on the right, your logic in between. Let go of a wire and the search offers only the nodes that fit, with what each one does. A live picture keeps the boat in sight.
06
Your own console, face on
The panel creator looks straight at the real console. Drag dials, switches and screens onto its face, size them by their handles, and link a dial to an engine's rpm right there. Try it works the panel before you launch.

07
At sea, a quiet top bar
Out on the water the screen belongs to the sea. A slim bar at the top reaches the map, the reports, your inventory and the book, each with its key, and the keys you need show along the bottom.

Watch it come together
A short film whenever an improvement lands, and every change listed as it goes in.
Help shape it
Something you would lay out differently, or a screen you miss? Tell us, and vote on what others asked for.